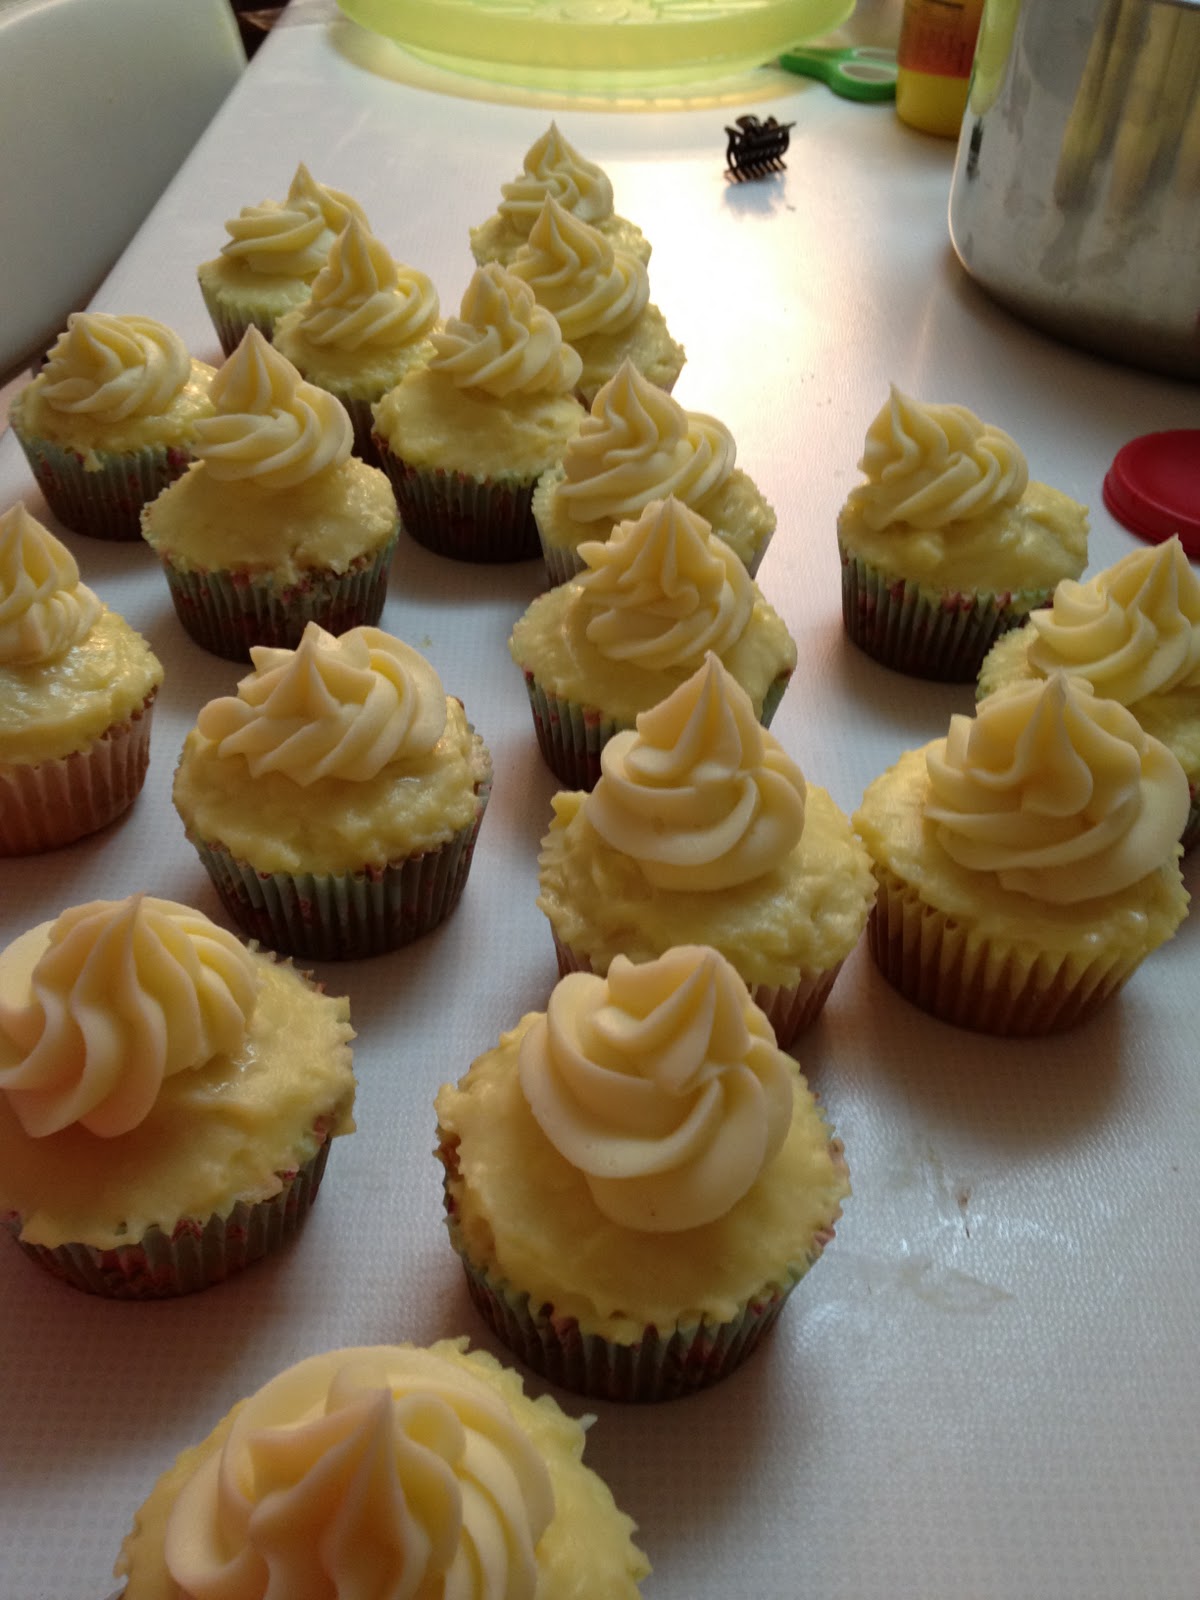
Monday, 26 March 2012

Chocolate Galore (Cheesecake and tart)

Okay, its been over a month since i last posted! i feel bad :'(
The reason for this was because of my crazy workload, and my cousins who came from out of town. I've had a lot going on recently. Now its over. Until the beginning of May until the end of June. I'll worry about that then.

Over my spring break i baked a few goodies I'm just dying to show you :)
I baked a white chocolate cheesecake, and a dark chocolate white caramel tart. The cheesecake; i was super impatient with the cooling, so i sprinkled the white chocolate on it while it was mildly warm, then shoved it in the freezer. What happened? the chocolate melted on top of the cake, and it froze as a hard shell! The only downside was that it was harder to cut. Let me show you!


I *would* have gotten a picture of the full cake but, **ahem** my brother and father were so impatient (like me! haha) they just had to have a slice! Ahaha. Now I see their love for cheesecake. I will make cheesecake more often although I'm not particularly fond of it. I do love white chocolate though. And the graham cracker crust! :)

For the tart, i didn't even have a recipe, i just added ingredients from my own head and it turned out SUPER! So I'm proud of that.The reason i call it "Dark Chocolate White Caramel Tart" is because its a tart layer with 1) A nice flaky crust on the bottom. 2) A thick layer of rich dark chocolate. 3) A white chocolate caramel layered neatly on top of the dark chocolate. Is your mouth watering yet? Mine is. I sure wish i had some right now! Im a chocoholic :)
For the white chocolate caramel i just combined a little condensed milk, butter, sugar, and white chocolate in a saucepan, melted it, cooled it then poured it over my tart. No official measurements or recipes because everything was done by eye off the top of my head. I'm guessing since white chocolate is relatively softer than dark/semisweet (or at least the brand i buy is!) it didn't harden like the dark chocolate, it was much gooier and a lot like honey. So... its a white caramel! :) Then... i decorated it!

Here's what it looked like before i added the white caramel:


Now with the white caramel:


And of course, decorated!


Personally i liked it before it was decorated, but my little sister insisted on "rainbow and colors". Now you know the story of my tart.
Ill update again soon!

Happy baking
xxx

Thursday, 16 February 2012

Be My Valentine?

So the weekend before Valentine's day me and my best friend made cupcakes! Yay! What's more fun? On the 14th, the actual Valentines day i spent most of the day sleeping and studying math. I spent the day with my math tutor! haha. Lots of fun learning "functions". Blah.

Anyways i bet you wanna know what i baked! i baked Devil's food cupcake with SMB!


This was the first time i ever made Swiss Meringue Buttercream. I have tried numerous time before. The first time i made it, i started to mix the egg whites and the butter at the same time. Big mistake. It became a white liquid with chunks of butter in it. the second time i attempted it (almost a year later!) a year later, it turned out way too thin. The third time i attempted it was when i made the Red velvet cupcakes for my friend's part, I should have mixed it longer but i didn't, i ended up adding cornstarch and icing sugar to the buttercream to thicken it and spread it.

This was the fourth time and it came out PERFECTLY. I did it the exact same way as "the third try", except this time i just beat it for longer (i have a hand held mixer), and it came out AMAZING. Just GREAT. After making this buttercream i don't think I'm ever going to make my regular ones. Well, maybe.


Swiss Meringue Buttercream is REALLY worth the time and effort. It has a wonderful, creamy, thick, buttery consistency and its not an overly sweet frosting. Really worth trying!

I hope everyone had a wonderful Valentine's day! :)

Happy baking!

xxxxx

Monday, 6 February 2012

Today I Love You More

Now your probably wondering who i love more. I love everyone more! I love my family more, my friends, my relatives, my blog followers, i even love math more!
Last week i had exams. 5 exams. My mom spent all her free time (and her not-so-free time) helping me study. I made this cake mostly because of her. Everyday i love her more!
Now your probably want to know what i baked, hm??
i baked a 4 layer cake, filled with pastry cream and frosted with white chocolate buttercream and dark chocolate buttercream. I'm sure you have noticed my obsession with pastry cream by now. It's actually my all time favorite dessert and favorite thing to make. It's also my moms favorite dessert because of its creamy-not-so-sweet taste. So i decided to fill the cake with pastry cream rather than with frosting. Not to mention all the butter i'm using to make the buttercream, the cost really adds up.


 Obviously we couldn't finish the entire cake on our own. So when i went to babysit my little cousins, i decided to pack them a nice, big slice.  They ate most of it, i think they liked it!


And of course there is my mom's slice, which she adored!


I'm just so glad i could make everyone happy, especially my mom!

Here are some step-by-step pictures that show you how i frosted my cake:

  1. Fill *cooled* cake layers with pastry cream, and refrigerate for about an hour

 This is what your finished version should look like:


TIPS: Make sure to distribute your pastry cream evenly! You dont want all your cream in between 1 layer, and no cream between the other. If your not sure how, measure the amount in a measuring cup, and divide it by the number of "fillings" your going to have.
Also don't forget that the number of filling is not the number of layers, unless your planning to frost the top of the cake with the filling.

2) Do a crumb coat!


This means use just a little bit of the frosting to frost the cake. Your coating should be very thin, and your layers/cake should still be visible. The reason we do this is because we don't want all the crumbs messing up the frosting. 
TIP: Make sure you refrigerate the cake for an hour, enough for the buttercream to harden. This way when you frost the cake the crumb coat wont get mixed in with the actual frosting.  I put it in the freezer for half an hour because i was pressed for time. It worked just as well!

3) Frost!


The first picture is me frosting the cake! :D
The second is the finished version. After step 3, if you don't want to add anymore that's fine, you can leave it as it. Personally i added some decoration to make the cake look prettier!

4) Decorate! 
I'm sorry, there's no picture this time :(
Use your imagination and decorate the cake however you like. Just remember:

  • Refrigerate the cake before use, the same way as the "crumb coat"! Put it in the freezer for half an hour if your pressed for time, it works! You don't want all the frosting to melt while your decorating! I've had this happen to me before, actually...
  • If you want to make words on your cake like i did, try imprinting the words or design with a toothpick before frosting. Once you add the dark frosting to your cake, you cant change what your doing!
I'm sure whatever you decide to do will be beautiful and unique. And yes, cake-making takes a lot of time, so try not to squeeze it in! I did not have time to finish the cake in one day, so i baked it and layered it on Friday, refrigerated it overnight, and frosted it on Saturday morning.

My next post is going to be on Valentine's day (or the weekend of),  Ill show you my devils food cupcakes I'll make with my best friend!

Happy baking :)

Tuesday, 17 January 2012

Triple Chocolate Brownie-bars

How many of you have been craving chocolate today? i know i have!! Lately i just can't get enough of the stuff! so i decided to make brownies. The regular, plain, ordinary brownies don't cut it- so i have to make mine it 2 times as good as the original! No, wait! THREE times as good! That's why i call these brownies: Triple Chocolate Brownie-bars! Take a look:


I made the larger ones for the adults, and the tiny "bites" for the kids (i just took one adult bar and cut it in half, haha)! My brother and sister were arguing over which sprinkles should be added to my brownies, so i decided to add sparkly red ones and brown ones.
In my recipe there is a white chocolate cream cheese frosting, a thick deep, dark, rich chocolate filling, and an even darker chocolate crust. Sadly, i cant remember the recipe right now, so i can't post it.
anyways i hope you enjoyed the pictures <3

EDIT:

OK! I'm back with the recipe for those who asked!

Base:
  • 3/4 cup flour, whisked
  • 1/4 cup regular cocoa powder
  • 1/2 teaspoon baking powder
  • 6 tablespoons butter, softened
  • 1/3 cup grnulated sugar
  • 3-4 tablespoons milk (whole or skim)
  • 1 egg
Butter an 8 inch (or a 9 inch) square baking pan. Preheat oven to 350 degrees. Beat the butter and sugar until smooth and creamy, about 2-4 minutes, add egg beating consistently, until smooth.  Add cocoa powder through a sieve, mix until combined. Add flour and baking powder through sieve and mix until combined. Add milk, 1 tablespoon at the time, and stir after each one, you do not want it to be too liquid-y. Pour cake batter in the greased pan, make sure you spread it evenly with a spatula, a knife, or a spoon, whatever is easiest for you (i used a fork actually!). The recipe calls for you to bake the crust for 20 minutes-- when i did this, mine came out a bit burnt on the corners. Maybe because i used a 9 inch pan instead of the 8? Anyways if you are using a 9 inch pan, i suggest you leave it in for about 15-17 minutes. With an 8 inch, just keep your eye on it!

Filling:
  • 1 stick and 6 tablespoons of butter
  • 1/4 cup milk
  • 1 cup unsweetened cocoa powder
  • 1 cup and 6 tablespoons sugar (prefferably superfine but granulated works well too!)
  • 3 tablespoons cornstarch
  • 4 large eggs
  • 1 shot Baileys Irish Cream (1/8th of a cup)
  • 1/8th of a cup sour cream (or if you really have none, yogurt would do fine, as would cream cheese)
Place butter, milk, sugar, and cocoa in a medium saucepan over low-medium heat. Stir occasionally, for about 10-15 minutes, until the butter has melted. In a separate bowl mix corn starch together with 1 egg. Add the other eggs, 1 at the time, beating constantly until pale and creamy. Take the chocolate mixture and slowly, whisking constantly, add it (about 1/3 of it) to the egg mixture. Make sure you are whisking it all the time, quickly without stopping so it doesn't curdle ***. Slowly add in the rest of the chocolate mixture, whisking constantly (i repeat myself a lot, hehe), until combined. Add baileys and sour cream, and mix.
*** I have been in a situation (making vanilla ice cream) where my egg mixture curdled. What i did was i put it through a sieve (or strainer) and discarded the cooked egg yolks.

Pour your chocolate filling over your cooled chocolate crust. Bake until set, approximately 30-35 minutes (at 350 degrees), the top will be bubbly and lightly puffed. Let cool for about an hour on a wire rack. 

Frosting:

Now this one i made off the top of my mind. I'll try my best to remember what it was :)

  • 2 cups confectioners sugar/icing sugar
  • 1/4 cup cream cheese (4 tablespoons)
  • 3 tablespoons butter
  • 1-2 tablespoons Baileys Irish Cream
  • 1 ounce white chocolate, hot and melted
Beat together cream cheese and butter until smooth.About half a cup at the time add in confectioners sugar, and mix until combined. Add in white Chocolate and Baileys. Refrigerate for about 10-15 minutes before use. If runny add more confectioners sugar, if too thick add a bit of milk (be careful with the amounts because this frosting will thin out fast).

Pour frosting over baked brownies. Add sprinkles of your choice, and cut them into individual squares.The you freeze it! that way it stays fresh for a while. when you want to eat it, warm in in the microwave for about 20 seconds. that way it become warm and melty on the outside, but still icy on the inside. Also, enjoy its chocolaty goodness!

Monday, 16 January 2012

Cheese Cakes

MY family just goes CRAZY for cheesecakes (especially my little brother) so i decided to make them :) Personally im not a big fan, but that's just me! Anyways, i made vanilla streusel-topped cheesecakes. When i made the crust i didn't have graham crackers (or the crumbs), so i used the streusel to make the crust too, except i added some cocoa powder to make it chocolaty :)

For those of you who have never tasted streusel, i suggest you do ;). Its a buttery-floury taste, with a hint of sweetness. for those of you who like things sweeter, use more sugar. for those who like it more floury, use less sugar. It taste similar to shortbread, except its a bit lighter/less dense.


My homemade Streusel:

  • 1 cup flour
  • 1/4 cup granulated sugar
  • 2 tablespoons light brown sugar
  • 1/2 stick butter, creamed
  • 1 tablespoon vegetable oil
  • 2 teaspoons vanilla extract
 (tip: for chocolate variation use HALF the recipe, add 2-3 tablespoons cocoa powder and the same amount of sugar. Use chocolate for the crust and vanilla for the topping.)

Cream butter and oil in a bowl until smooth, add vanilla extract. Add in flour, and sugar and mix until clumps are formed, do not over mix. Cool in freezer for about 5-10 minutes, or in your fridge for 1/2 an hour. Add 1 heaping tablespoon of chocolate streusel into each muffin tin (greased or with cupcake liners), press down using a round flat surface or a spoon of some sort. Bake at 350 degrees for about 6 minutes. Add cheesecake batter, and fill until muffin tins 2/3 full. For streusel topping, prior/before to putting the cupcakes in the oven, sprinkle 1/2 a tablespoon (or 2 teaspoons) of the white/vanilla part of the topping, and bake according to the instructions. 

Enjoy <3

Friday, 13 January 2012

Boston Cream Pies

Last weekend 2 of my three best friends came over. Guess what we did? We baked! At first we had a tough time deciding what to make, but then it hit us- Boston Cream Pie! Whats more enjoyable? so instead of making a big pie, we made 22 little ones, that way each person could have their own cute individual pie.


i also decided to add step-by-step instruction with pictures! this is what you need:
  • muffin tins (for baking the pies)
  • a heat proof bowl and a pot
  • an offset spatula or a butter knife
  • 1 recipe of pastry cream
  • 1 recipe chocolate ganache (provided below)
  • 1 recipe of mini Boston cream pies
  • a sharp knife (for cutting)
Chocolate ganache recipe:

  • 8 ounces semi sweet chocolate, chopped
  • 2 teaspoons cornstarch
  • 2/3 cup condensed milk
  • 1 and a half tablespoons butter
  • 2 ounces chopped white chocolate
Add chopped chocolate to a heatproof metal bowl. Bring condensed milk to a boil on medium high heat. Pour into chocolate slowly, whisking constantly. Pour the chocolate mixture back into the pot on low/medium heat. Add cornstarch and butter, whisking constantly until thickened approximately 5 minutes. Pour back into heat proof bowl and let stand for 5-10 minutes before use.

  1) After your Boston cream pies are finished baking and cooled, slice them in half. 
 
 
2) Layer the halved pie with pastry cream


 3) Add the top part of the pastry to the bottom part


4) Using a spool, drizzle the ganache over the Boston cream pies


Enjoy!!!!!

Sunday, 8 January 2012

New Years cupcakes

I've been busy lately and i haven't had time to upload my new years cupcakes! But i guess its better late than never :)

The first picture is what the cupcakes looked like without the frosting (and the thin layer of "creme brulee")
The rest is what they looked like with the frosting!


I made Vanilla-creme brulee cupcakes and white chocolate/dark chocolate frosting.

While i was frosting the Cupcakes with white chocolate frosting, half way through i ran out of frosting. I was going tomake more, but i couldnt because i had used up all the white chocolate.
Instead i made dark chocolate. This was a great idea because it turns out not everybody loves white chocolate as much as me (haha), and some preferred the dark chocolate ones!
i made 28 cupcakes (some for me, and some for my cousins) and they were all gone within 3 days!

Wednesday, 28 December 2011

Happy holidays!!!


this was the gingerbread house that i made for the holidays. However, the only problem was, i didn't cut the sides properly so i couldn't add a roof to my house :(. to make the house hold its shape, i added a marble cake inside (my mom's favorite!). I decorated the house with skittles and frosting. I didn't have any meringue powder to make royal icing with, so i used a basic buttercream frosting.It worked fine for me!

1 stick butter, softened
1 shot (2 tablespoons) Baileys Irish cream
3 cups confectioners sugar (icing/powdered sugar)

Cream butter until light and fluffy, about 3 minutes. Add in confectioners sugar, 1/2 cup at the time until thoroughly combined. Add Baileys. Add food coloring if desired. Use immediately, do NOT refrigerate or it will become to hard to frost, and wont stick the gingerbread to the cake :)


These are my fudge-presents. i decorated squares (rectangles) of fudge and decorated them as gift boxes! i didn't have my decorating bags with me when i made them, so i used a Ziploc bag, cut one of the corners off and used those to decorate them. i used the basic buttercream frosting to frost them.

While i was making the fudge, the chocolate wasn't setting and it was very dripping, so i had to add cornstarch to allow it to set, which turned it crisp on the outside, but still very fudge-y on the inside!


There was a lot of gingerbread cookie dough left over, so i decided to make some Hanukkah gingerbread cookies for my best friends' Hanukkah party! I decorated them with the same frosting, and the same candy as my gingerbread house.


I felt bad that i was only giving them a few cookies, and they had given me SO MUCH during the year, i felt that i HAD to bake them more! so i baked them cupcakes! i made red velvet cupcakes with a failed Swiss meringue buttercream. After adding the butter to the egg whites and sugar, it came out curdled and liquidy even after beating. I added some icing sugar (didn't measure, maybe 2 cups?) and a tablespoon of cornstarch to thicken it so i could spread it on my cupcakes. i served the cupcakes and the gingerbread cookies on a platter i decorated! Here is what it looked like:


Everyone was so pleased with what i made over the holidays! I was also really happy that i could put smiles over everyone's faces with pretty little cakes :')

hope everyone had wonderful holidays!